Truth be told, I don't recall where the inspiration for these bronze spring shelf brackets came from. Normally there's a clear memory of what led to the development, iteration, and final fabrication of most things I make. Sometimes it's just a “let’s modify an old mantel clock” moment, followed by an intense search for the ideal starting material. Once the base has been requisitioned, it acts as a blank canvas. Form follows function, and—just like every other smithy—I rely on whatever secondary materials happen to be laying close to hand. It’s mostly an ad hoc art.
If I concentrate, my gut tells me the source well came from springs. And no doubt, just to be a cocky git, when the iteration process finished, I chose bronze. Because how often do you see bronze springs outside of fine scientific instruments or medical equipment? Exactly! I can imagine my customers thinking while browsing these brackets: “Bronze springs? Don’t see them often.” I suppose these bronze spring shelf brackets appeal to people who have an eye for the unusual, the quaint, and the rare.
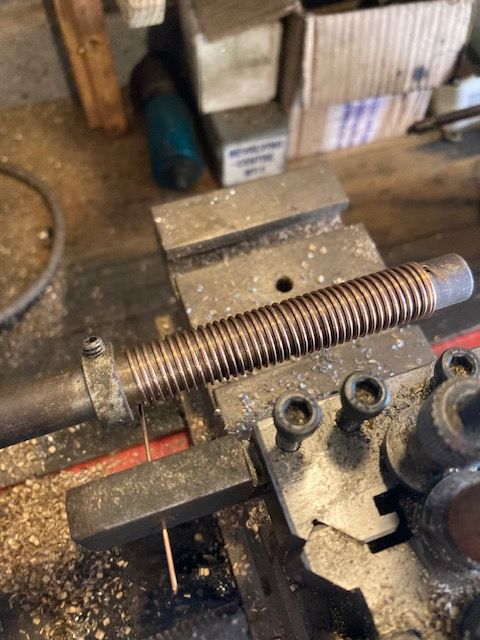
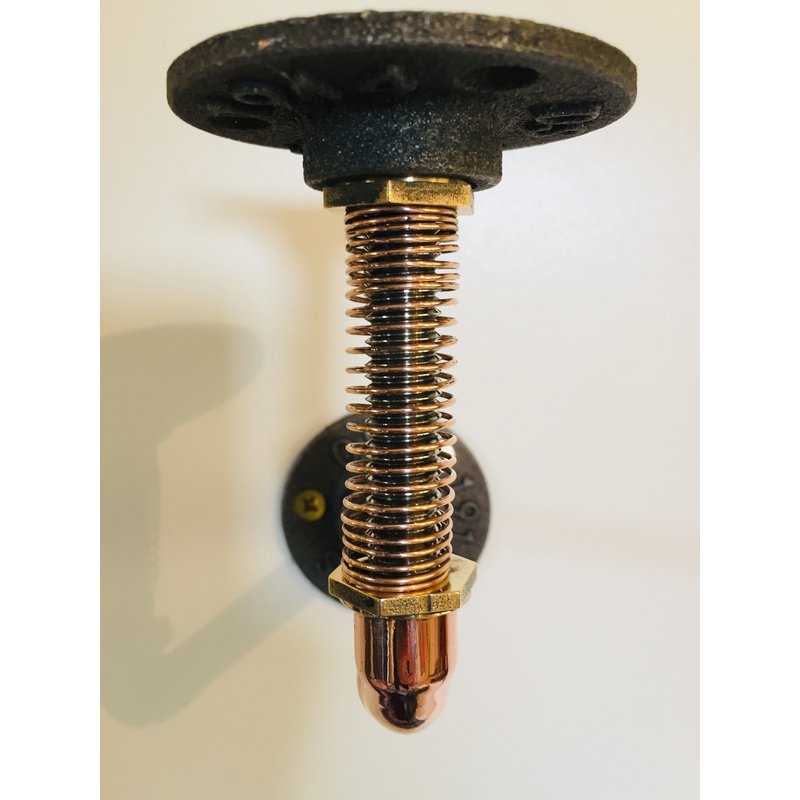
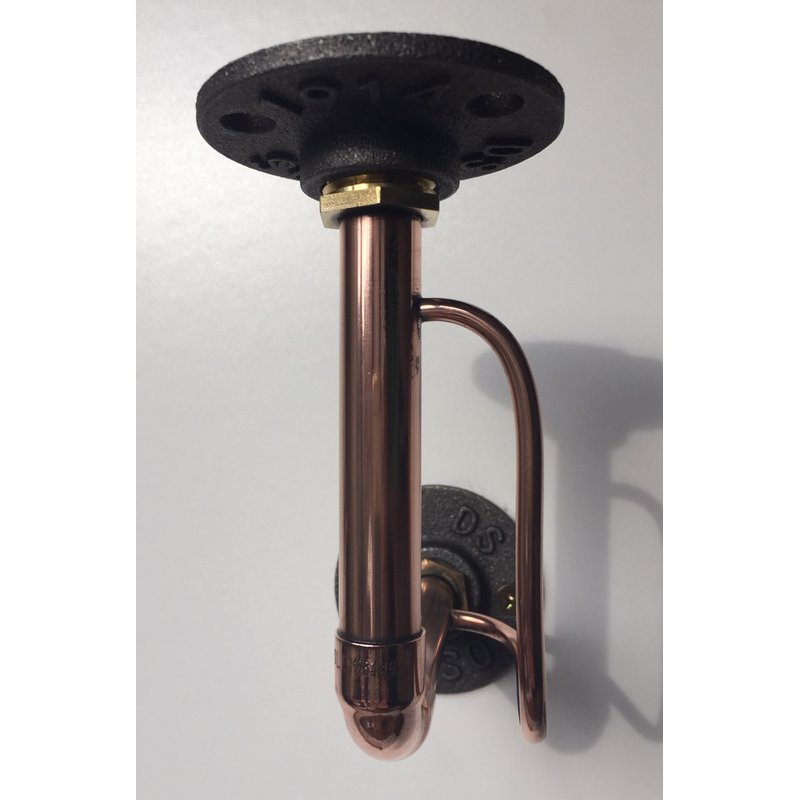
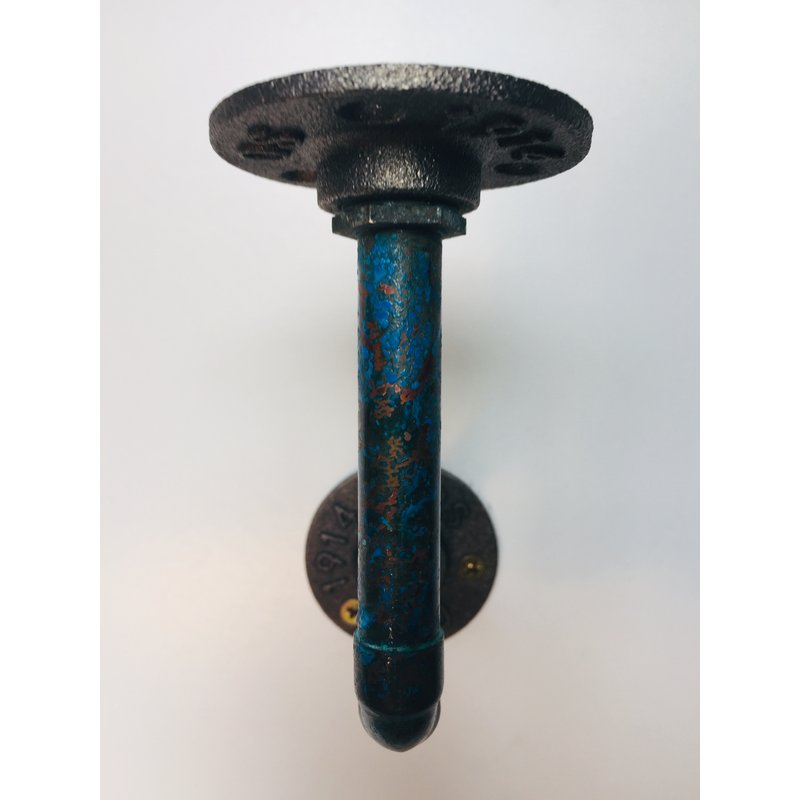
I do vividly remember, however, the challenge of placing a spring between the lower cross section (the bit that fixes to the wall) and the cast iron flange that holds the shelf in place. Initially, I just wanted to use a spring. Though that proved to be a will-o’-the-wisp idea—something people might appreciate for novelty but not so much for the resulting wobbly shelf. Plus, it was taking forever to figure out how to mount the spring securely (it was a steel spring, by the way). Wobbles aside, yes, I could do it—but the time taken to achieve seasick-inducing shelf brackets made them impractical for sales.
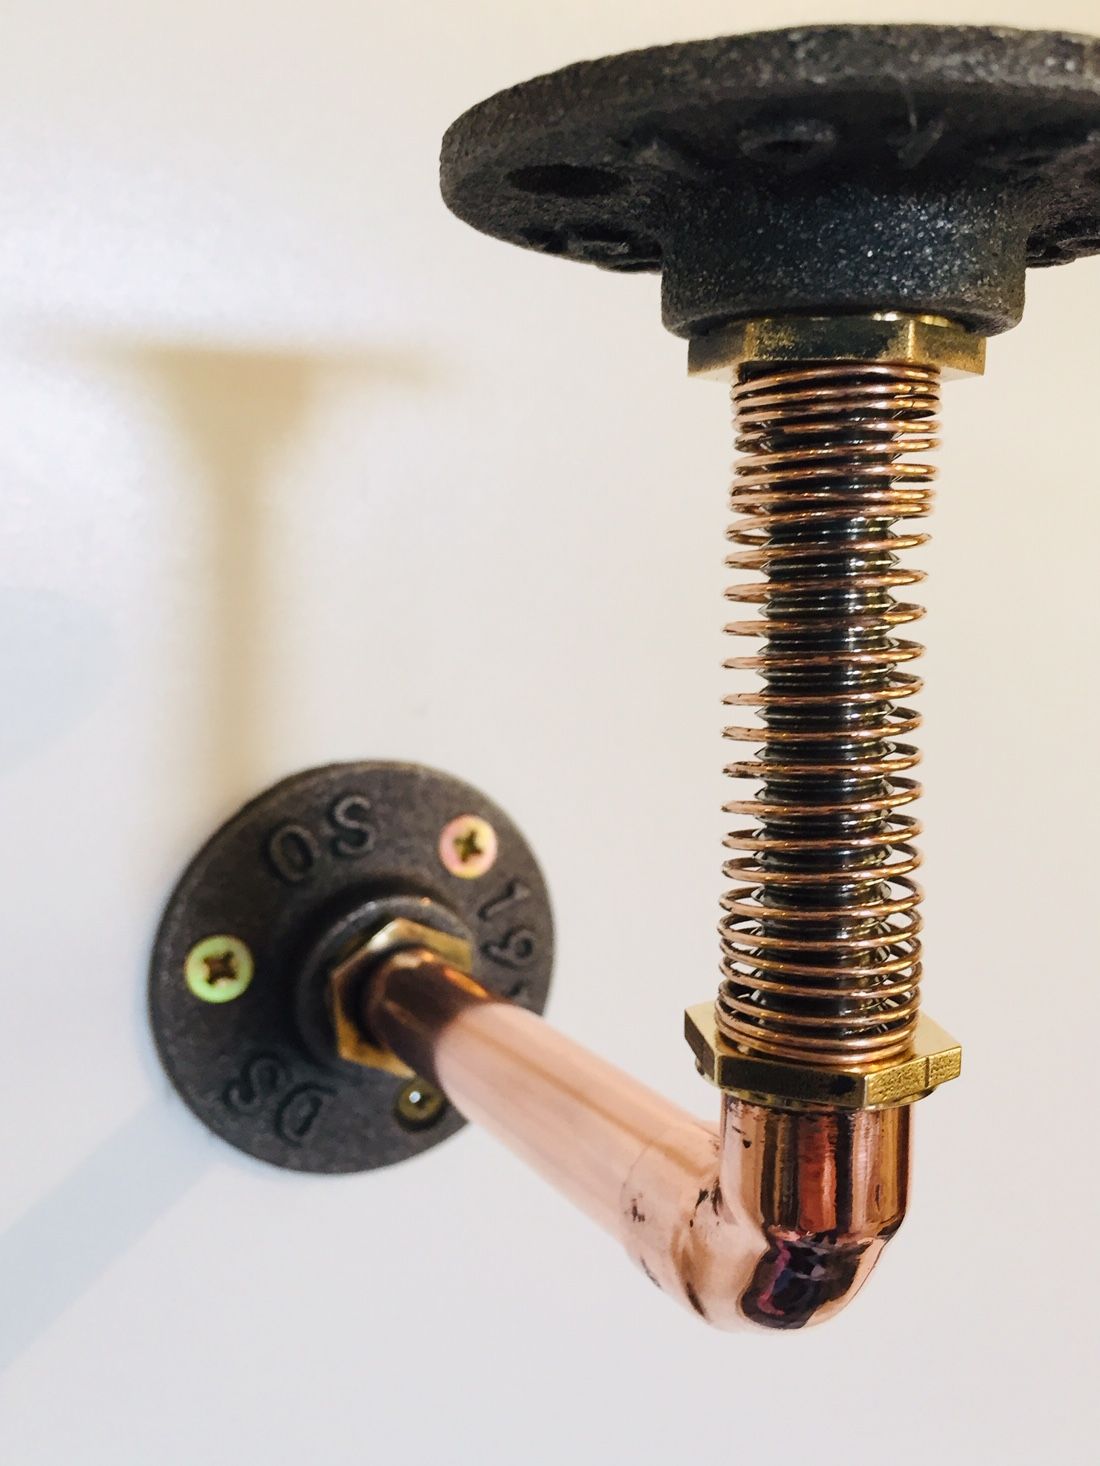
So it was stability—the quest for it, and the eventual achievement of it—that led to incorporating bronze springs into the final design. That stability came in the form of 300-series stainless steel, M12 threaded bar. At first, I used galvanized mild steel. But it looked awful. The galvanized steel had the air of a bargain-basement item that had been discontinued, left dusty on a shelf, now available at 75% off. Then I spied the stainless. She was winking at me. Cheeky flirt. If I didn’t know better, I’d say she led me down the galvanized route on purpose—so that when I did finally catch her eye, I’d know she was the one.
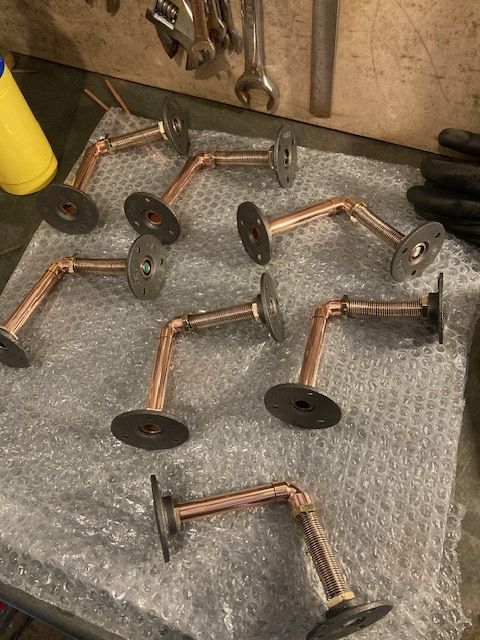
She doesn’t appear obviously in the fabrication images below, but you can catch her flashing a leg in the product listing here (click on the image to enlarge). These particular brackets shown in the images below were made for a well-known American cider brewing company. I can’t name them due to client confidentiality. Though interestingly, they weren’t the first proprietors of alcoholic beverages to buy these bronze spring shelf brackets. The first time I shipped them abroad, they went to a Canadian company.
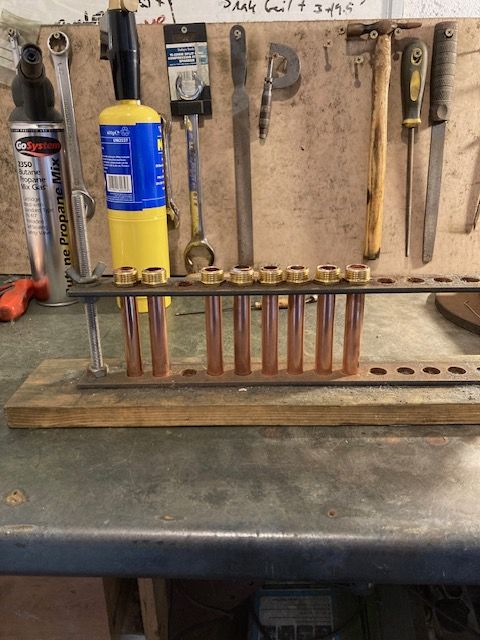
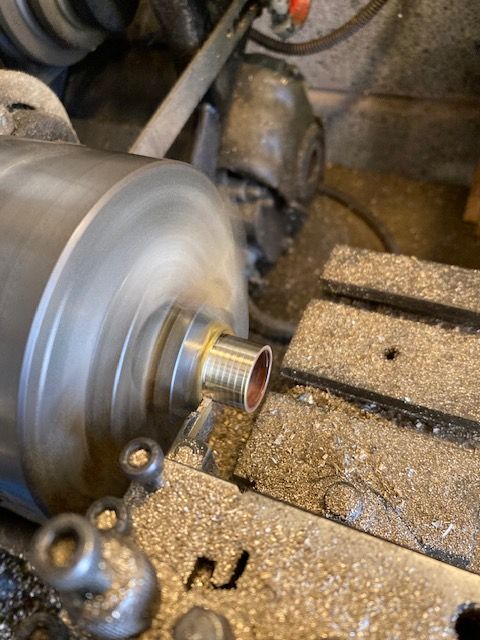
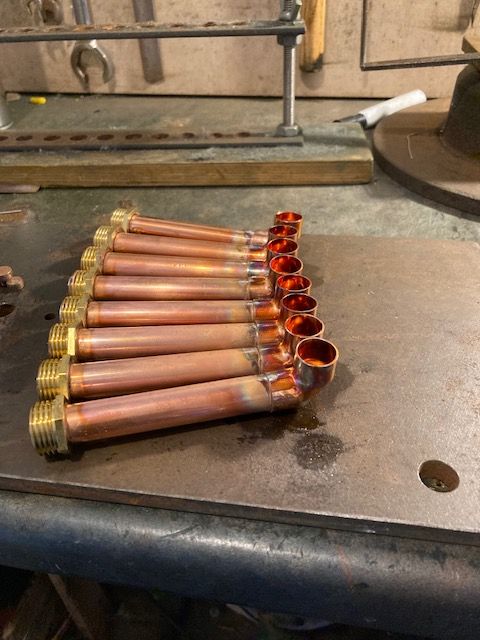
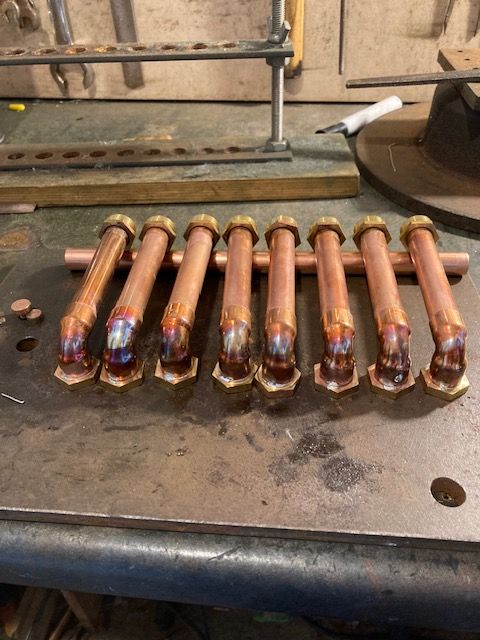
Still, the images below depict the general milestones of the fabrication process. First, the copper tubing is cut to size. Then come the brazed brass bushings, cradled in a jig to maintain a straight edge and continuity of length. Next, we lathe down the brass bushings that hold the foxy stainless in place. These bushings are later housed in the elbow joint shown in the following image—and again, post-braze, in the one after that. The second-to-last photo shows the little tooling I threw together for hand-making the bronze springs. And, of course, the final image is of the finished items just before they were posted to the USA.